Here we outline a big-batch vegetable soup that stretches to a full workweek of lunches without tasting dull. We tested this using seasonal vegetables, dry herbs, and a forgiving stock base that still feels bright. We measure everything in cups and tins to keep costs predictable and methods replicable. We cook in a single pot, keep notes, and group jars by portion to simplify defrosting. We know freezer science: solid flavour survives freezing when vegetables are not mashed and when we finish with a bright squeeze of lemon or a splash of vinegar. It remains flexible enough to adapt to misses in the pantry and to make use of leftovers that would otherwise go to waste.
Plan and Prep: Building the Batch
We plan to yield twelve to fourteen portions, depending on how generous we are with the vegetables and the portion size for lunches. The goal is to create a soup that remains comforting after freezing and reheating, not a faded, watery remnant. We choose a mix of root veg, greens, and canned tomatoes to build depth without needing stock cubes for every batch. We start by checking the weekly veg load from the market and planning around what is cheapest or freshest. Salt and pepper play their roles later as we fine tune the flavour after simmering for a first hour, so we do not oversalt at the start. We write the plan on a scrap of paper and keep it visible near the stove.
We assemble the ingredients in a predictable, budget-friendly lineup: onions, carrots, celery, parsnips, potatoes, leafy greens, and a couple of cans of tomatoes. We include a handful of herbs dried or fresh, and a bay leaf or two to provide a backbone. We also add a small amount of white beans or chickpeas for protein and texture. We keep stock simple, using water with a pinch of miso or a splash of lemon later to lift the palate. We chop everything on a large board and keep a little mise en place to speed the cooking. We do not overfill the pot; a generous simmer is easier to manage when the vessel has room. We keep the plan flexible so we can swap ingredients if something looks better at the market and still stay on budget.
 Save
Save
Stocking the Pot: A Veg-Forward Flavour Base
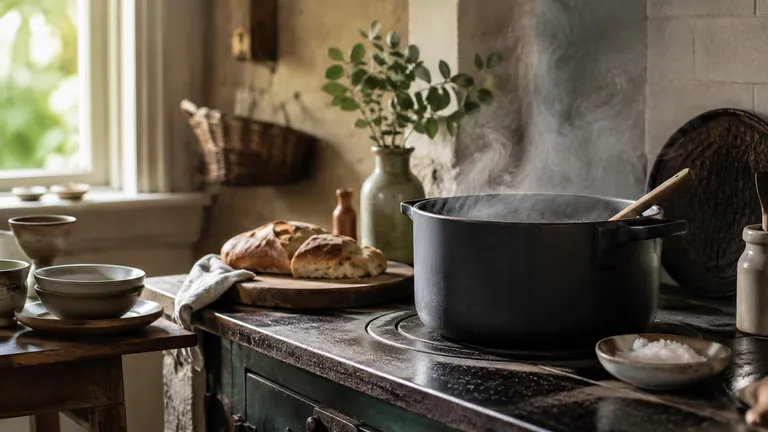
To start the soup, we heat olive oil in a heavy pot and soften onions, carrots, and celery until the kitchen smells sweet and warm. We watch the edges colour and the base come alive, knowing that patience here pays dividends later when the broth needs to carry more than a whisper of flavour. We add a clove or two of minced garlic, a pinch of chilli flakes for warmth, and a couple of bay leaves to give the pot direction. We do not rush the softening stage, because the aromas are the compass for the rest of the cook. We taste as we go, refining the balance with a pinch of sugar or a splash of vinegar if needed, and we keep a clear head about salt for the final tasting. This is where our budget-friendly vegetables begin to sing and our freezer plan starts to gain momentum. We keep the flame moderate and the lid slightly ajar to monitor the simmer.
Next we stir in the tomatoes, either crushed or chunked, and perhaps a little tomato paste to deepen the colour. We add chopped vegetables that are forgiving in a simmer: carrots, celery, and parsnips join the pot with a handful of potato chunks for body. We top with water or a light stock, then simmer gently so flavours can mingle without boiling the life out of the carrots. We fold in greens at the end so they hold their colour and nutrition rather than surrendering to the heat midway. We season with dried herbs, oregano or thyme, and a good grinding of black pepper while keeping back extra salt until we taste the finished soup. The result is a pot that smells like a weeknight supper and looks like something you would share with family. We let the pot breathe a little at this stage to deepen flavours and improve balance.
 Save
Save
“A well-made soup is the quiet victory of a budget cook.” — Nadia
Cook, Cool, and Freeze for Fourteen Meals
Once the base flavours have mingled, we let the soup simmer long enough to fork-tender vegetables and a broth that tastes like it has aged gracefully, not rushed. We taste after an hour, then adjust with a little salt, a squeeze of lemon, or a splash of vinegar to brighten acidity. We purposefully avoid overly thick textures by keeping the liquid ratio generous, knowing this makes portioning into jars easier. Cooling is deliberate: we ladle into wide-mouth jars in shallow layers so heat dissipates quickly and the risk of uneven freezing drops. We label each jar with the date and contents, then stack them upright in the freezer to reduce space. Finally we plan the jar sizes around food-starter portions that can be grasped for a single lunch or shared with a colleague. We also sketch a plan for a longer, slower simmer if ingredients require more time to release their sweetness.
To keep the batch flexible, we portion into multiple sizes: some two-handful portions for quick lunches, some larger for easy dinners, and a few half portions to test the defrosting speed. We avoid dairy or heavy cream in the soup itself, keeping the base vegetable-forward and forgiving for freezing. When protein is desired, we add chickpeas or white beans rather than meat, which keeps the dish kinder to budget and more versatile. We wait until the soup is completely cold before sealing the jars to avoid condensation and ice crystals that can collect around the lid. We place the jars in the freezer upright and ensure there is a small air gap so the liquid can expand slightly during freezing. Thus we arrive at a stock of ready-to-heat meals that travel well in a lunch box. We often lay out a practice batch as a test to confirm the portions work as expected and to refine freezer placement.
 Save
Save
- Wash vegetables in stages to keep prep calm and tidy
- Keep a running tally of stock usage to avoid waste
- Label jars with date and contents for easy rotation
- Store in shallow portions for faster defrosting and even heating
Serving, Reheating, and Keeping It Fresh
Reheating is a small ritual that preserves texture and brightness. We thaw gently in a pan over low heat, or heat from frozen in a pot with a splash of water. We stir frequently and adjust if the broth looks too thick or the vegetables have absorbed too much liquid. A quick squeeze of lemon or a handful of chopped parsley can lift the entire pot. We recommend a 15 to 20 minute reheating for most portions, with additional time if starting from frozen. We are careful not to overcook greens, which can turn soft and dull in the middle of a busy week. We keep the process brisk but gentle to retain some bite in the vegetables.
Serving ideas are simple and low effort: ladle into bowls, dust with paprika or chilli flakes, and serve with crusty bread or a wedge of cheese. If you want extra protein, a dollop of yoghurt or a spoon of hummus can be swirled in after reheating; otherwise the soup remains vegan-friendly and filling. We keep the portion size consistent to avoid reheating more or less than required, and we plan a slightly larger batch if we know we have longer weeks ahead. Our weeks feel calmer when lunches arrive ready, and we notice fewer takeaways because the soup travels well in a lunch box. The freezing chemistry holds, and the real flavour makes it through the freezer, the fridge, and the microwave intact. A well balanced finish makes the last mouthful as satisfying as the first.
Prepare the base and gather ingredients
We begin by washing and chopping onions, carrots, celery, parsnips, and potatoes. We measure out twelve to fourteen cups of water or light stock, and set aside canned tomatoes, beans, and greens. We arrange ingredients on a large board to keep the pace steady and to avoid last-minute scrambles. We write out a simple plan with approximate timings: one hour for the initial simmer, twenty minutes for rest, then freezing in portions.
Sauté aromatics and vegetables
We heat a heavy pot with olive oil and soften the aromatics until they smell sweet. We add root vegetables and tougher vegetables first, then toss in quicker-cooking greens later. We season gradually, tasting as we go, and keep the pot at a lively simmer to avoid soggy texture. We avoid crowding the pan to prevent steaming rather than browning, which would dull flavour.
Simmer, season, and reduce
We add tomatoes, herbs, and water or stock, then let the soup simmer for at least 40 minutes to an hour. We test tenderness with a fork and adjust salt, pepper, and acidity. If the liquid looks thin, we tip the pot towards a gentle reduction to deepen the flavour. We finish with a bright squeeze of lemon or a splash of vinegar just before cooling.
Cool, package, and freeze in portions
We cool the soup rapidly by transferring into shallow jars and placing in a cool corner or fridge. We leave a small air gap in each jar to allow for expansion during freezing. We label jars with contents and date, then stack them upright in the freezer. We plan portions that fit a single lunch and reserve a few larger ones for days when we need extra fuel.
Frequently asked
Can I adapt the recipe with seasonal vegetables?
How long will it keep in the freezer?
Do I need to defrost before cooking?
Can I make this vegan?
Can I freeze soup with dairy?
How do I reheat without a soggy texture?
What is the best portion size for lunches?
In closing
In this batch-cook routine, we find calm in the kitchen and reliability in the lunch box. The pot becomes a workhorse, turning humble vegetables into a week’s worth of meals that feel starchy-satisfying but light. Freezing with care preserves flavour, colour, and texture, and planning portions keeps us out of the take-away loop. The method is forgiving, repeatable, and saves both time and money without forcing us to compromise on taste.
Nadia Coman
Home cook and recipe tester. Believes the best meals come from a short list of good ingredients.
Get the next story in your inbox.
One considered email from Dollar a Day Meals when we publish something worth your time. No noise, unsubscribe anytime.